Planning Tools
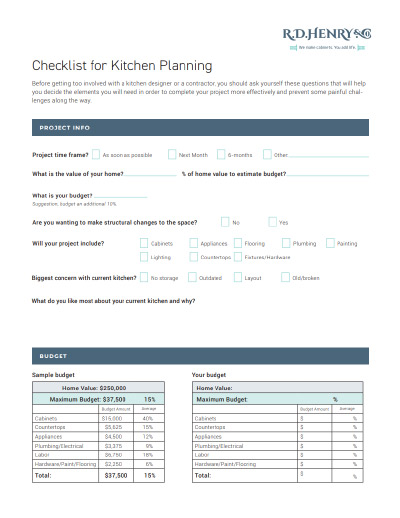
Download Checklist for Kitchen Planning
Download our kitchen checklist, a great tool that will help you answer basic questions before you talk to a kitchen designer, which will help take the guesswork out of the planning process.
Click on any headline to expand posts
What’s the first step when planning a stylish, functional, enjoyable kitchen? Most people would start by creating a wish list, compiling clippings of design ideas, or perhaps establishing a budget. While these are all great ways to get your kitchen remodel rolling, it’s important to back up and look at the big picture.
Have you ever walked into a home and upon entering the kitchen felt like you had been teleported into a completely different house? Perhaps the homeowners went wild with color and texture, but failed to extend that throughout the remainder of the home. Or they expanded the footprint dramatically, creating their “dream kitchen” at a size completely out of scale with the rest of the floor plan. Failing to understand and work within the boundaries of a home’s pre-existing scale and style can create a space that—while it may be lovely as a standalone—takes away from the home as a whole. This can be off-putting to the homeowners, their guests, and—when it comes to selling the house—potential buyers.
Before jumping into wish lists or design concepts, assess your current home and kitchen according to four criteria: scale, layout, style, and purpose. Call it “Step Zero” if you like, but following these steps for evaluating your house will make your design decisions easier and help you to avoid creating a kitchen that is at odds with the rest of your home.
Establishing scale
Most of us want more space in our kitchen, regardless of how much storage, square feet of countertops or power outlets we have. If you are contemplating a major renovation that would dramatically expand the size of your kitchen, take time to consider the scale of other rooms in your home. Will your kitchen now be out of proportion when compared to your dining and living spaces, or are you bringing an undersized kitchen up to scale with the rest of the house? If you are upsizing the room, can you extend the usable space of adjacent rooms as well? If your kitchen feels cramped, is it possible to open up a wall into another room to create a more open feel without having to move exterior walls?
Evaluating layout
Where is your kitchen located in your floor plan? How does your family walk through the room? Do you have traffic flow issues because of tight spaces or doorways? Improving flow and creating a more open feel can start with simple adjustments. If you have a door to the kitchen that is never closed, you can remove the door and trim to gain back a few precious inches without changing the overall size of the doorway.
Defining purpose
Kitchens often aren’t just for cooking. Does your kitchen play a role that might typically be performed by another room? How does your family use the space? Is it a spot for meals? Conversations? For homework or working from home? What gets “dumped” in the kitchen? Backpacks? Laptops? That gigantic 48-pack of paper towels you couldn’t resist?
Spend time thinking about how you currently use the room, paying attention in particular to the uses that don’t relate to cooking. Every custom kitchen designer understands how to optimize your space for typical tasks like food prep, cooking and baking, but providing them with details on how you currently use the space will help them create a new design that is more tailored to your family’s needs.
Next steps before starting your new project.
After carefully considering how the layout, style, and purpose of your kitchen fits with the rest of the house, it’s time to define your kitchen renovation project by assessing your unique priorities, identifying the spaces that will be impacted by the renovation, seeking opportunities to optimize your budget, and applying the information you gleaned from Step One.
Assessing your current and future needs
If you’re preparing to renovate your kitchen, you should already have a good grasp on your current needs. After living with your kitchen for awhile, you’ve discovered where traffic jams occur, which cabinets get cramped, and the spaces that go underutilized. While your mental wish list undoubtedly addresses the shortcomings of your kitchen for current needs, your remodeled kitchen should be designed to serve your future needs as well. Will there be changes in your family over the coming years? Are you planning to have children? Will kids be leaving the house? Who and how many people will be eating, cooking, and working in and around the kitchen? Will your family have accessibility needs over the coming years?
Take time to carefully consider how your family’s lifestyle may change over the coming decade. By planning for the road ahead, your new kitchen can easily accommodate your current and future needs.
PLAN FOR THE ROAD AHEAD AND YOUR KITCHEN WILL ACCOMMODATE YOU IN THE FUTURE
Determining affected rooms
Which rooms will be impacted by a remodel? Will you be opening up doorways or moving walls, affecting adjacent spaces like a family room, dining room, mudroom, bathroom, or pantry?
Will you be changing the flooring in your kitchen? Many times the footprint of your cabinetry will change necessitating the replacement or patching of the existing kitchen floor. If you do make changes to your floor, you may want to continue the new flooring look into neighboring rooms. Similar changes may also be appropriate for trim, lighting, wall surfaces and paint. Don’t lose the positive impact of your kitchen remodel by neglecting the surrounding rooms. Besides, you may be able to realize additional savings by tackling multiple rooms at once. Which brings us to…
Looking for opportunities to save
Any kitchen renovation will require certain things; demolition, cleanup, an electrician, a plumber, and lots of workers on-site. Once you have a team at your home for your kitchen remodel, it may be cost-effective—and in some cases necessary—to utilize them for additional projects.
Since walls will be opened up, water and power will be shut off, and skilled labor will be in your home, consider making additional planned renovations to bathrooms, electrical service, or other areas of the house while your kitchen project is underway. Because contractors prefer taking on larger projects over multiple small ones, you should be able to realize cost savings by having all of the work done during a single job.
Applying what we learned from “Step One”
Step One helped you identify the location of your kitchen within your floor plan and understand the role it plays in your house, including the activities it is used for and how its style and scale are influenced by the remainder of your home. Are your current and future needs for your kitchen compatible? Will you be expanding the role that the kitchen plays in your day-to-day life? Are there opportunities to improve your design by making changes to neighboring rooms as well?
The goal of these thought exercises is to encourage you to look at your home with a fresh set of eyes. Our next step will cover identifying the kitchen style that works best for you. After that, we will discuss working with a professional kitchen designer, making informed budget decisions, and dealing with contractors and renovations.
Zeroing in on a style
In step one of the design process, we contemplated how the layout, style, and purpose of your kitchen fits with the rest of your house. Step two focused on identifying priorities, seeking opportunities to optimize your budget, and pulling together a big picture plan. Step three of the design process focuses on identifying a kitchen style. Whether you’re working with an interior designer or taking on the project yourself, you will need to spend some time researching your options in order to choose the look that works best for your home. In many ways, your kitchen should flow with the style and era of your home, but there are still opportunities to express your individuality. Dozens of style names such as country, cottage, modern, traditional, and Tuscan help define the specific style choices, but you can start with even more basic questions. Do you like sleek lines or ornate details? Do you like natural woods or painted surfaces? Are you all about cool, or all about cozy? Does your kitchen need to match or harmonize with a dominant style like arts and crafts, modern, or Victorian that’s prominent in the rest of your home?
While there are dozens of choices to choose from, the core style decision comes down to a traditional kitchen or a contemporary kitchen. Traditional kitchens typically include cabinet doors with detailed woodwork, natural wood colors, and a warmer feel. Contemporary kitchens have simpler surfaces, often bolder colors, and may place an emphasis on space and light over complex details.
Resources to aid in your exploration
Sound overwhelming? Fortunately, you have a number of great resources at your disposal to inspire you. Even before you get professional advice from a designer, you can familiarize yourself with popular styles. Start exploring on Pinterest.com and Houzz.com, which contains thousands of neatly categorized photos. Often you will get more results than you expected. A search for “red galley kitchen,” for instance, returned 6,967 results.
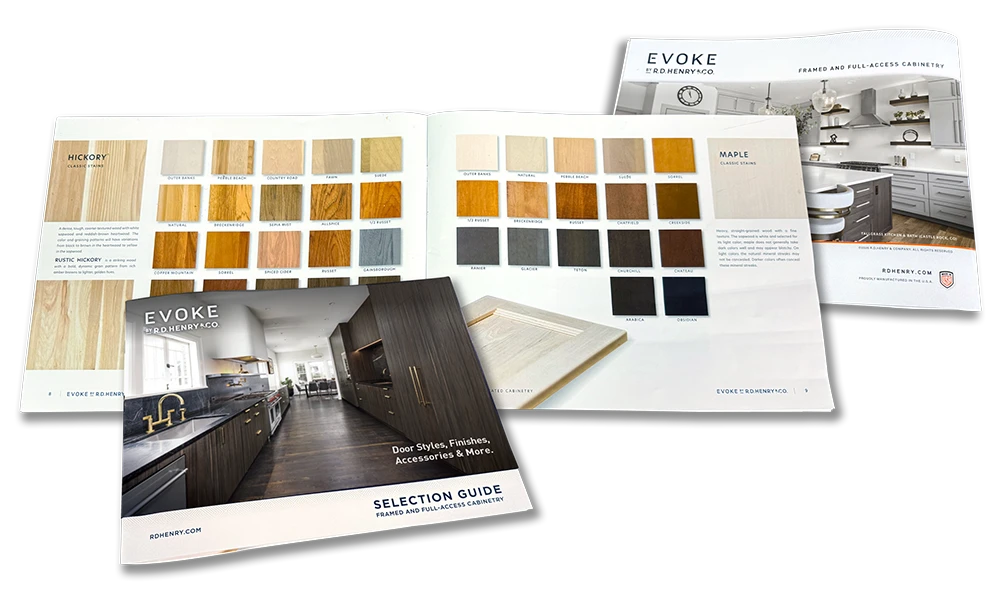
Be sure to visit the Products page of this site for a library of door styles and colors, as well as the Idea Gallery for photo galleries of finished kitchens. You can also see descriptions for twelve of the most popular style types and the matching door styles and finishes in our cabinet lines by visiting our Discover Your Style page.
Finding the right kitchen designer doesn’t have to be challenging
In step one of the design process, we contemplated how the layout, style, and purpose of your kitchen fits with the rest of your house. Step two focused on identifying priorities, seeking opportunities to optimize your budget, and pulling together a big picture plan. Step three helped you identify a kitchen style.
Step four of the design process focuses on selecting a professional kitchen designer. Hiring a kitchen designer in most cases will be money well spent. Beyond just assisting you through the myriad of decisions related to your remodel, a designer can introduce fashion-forward colors and finishes that will keep your kitchen looking fresh and up-to-date for years to come. Even better, professional designers are experts at assessing the needs of homeowners and planning out spaces that provide the storage, functionality, and configuration that will make a renovation a successful one. Their contributions can help bring the project to completion on time and within budget.
When you hire a kitchen designer, you have two choices: A designer who focuses just on design, or one who works as a contractor and will handle the entire project. If you choose a designer who specializes in just design, you will be responsible for choosing a contractor to implement the design – although the designer may be able to provide a list of recommended firms.
Don’t be shy. Interview a number of designers, and don’t be afraid to ask questions about their experience, working process, and qualifications. The following are some key pieces of information you should take into consideration when choosing your kitchen designer.
Determine qualifications
Not everyone who claims to be a kitchen designer has the experience and credentials to back up that statement. Many professional designers have certifications from trade organizations focused on providing training for kitchen and bath specialists. A good designer is a knowledgeable designer, so look for someone who regularly attends education sessions and industry trade shows to keep up-to-date with the latest techniques, products, and styles.
Chat with past clients
If you have friends or family who had a great experience working with a kitchen designer, fantastic. If not, ask the designer if you can speak with a recent client or two about their experience. This isn’t just about verifying that the designer performed his or her duties; it’s a helpful way to get another perspective on how the process and interaction worked over the duration of the project.
Identify your role
The ideal design for a client’s home isn’t what is best for the designer, but what is best for you. It’s important that even though you’re handing off some of the planning and design choices to a professional, you remain an integral part of the planning process.
An experienced designer will spent time talking with your family about your needs, tastes, and how you anticipate using your kitchen, not just today but in the coming years. They will then use this feedback to tailor a design around you, not their own preferences.
Careful planning will keep you from having to dip into the piggy bank
In step one of the design process, we contemplated how the layout, style, and purpose of your kitchen fits with the rest of your house. Step two focused on identifying priorities, seeking opportunities to optimize your budget, and pulling together a big picture plan. Step three helped you identify a kitchen style, and step four explained how to hire a designer. Step five of the design process addresses working within your budget and making informed decisions. After you’ve spent some time working out the scope of your renovation and have begun consulting with a designer to get a better feel for the overall cost, it’s time to lock down your budget and put together a plan that gives you the kitchen you need without breaking the bank. It isn’t the most exciting part of a kitchen renovation, but it’s essential for identifying what is and is not realistic for your project. Some time spent on budgeting now will give you helpful rules for making decisions as you proceed and will keep your project from turning into a money monster.
Coming up with an estimated cost
Your kitchen designer will be able to provide some average costs for remodels of your size and style. Note that national averages are just that, averages, and that costs in your area may vary drastically according to location, availability of labor, and even shipping costs. Be sure to seek out local numbers if possible. Talk to your friends and family who have undertaken similar projects. Speak to clients of your kitchen designer or contractor to compare notes.
What should I spend?
Take some time to examine your finances and establish exactly how much you can afford to spend. Then ask yourself, “How long do I plan to stay in my home?” Typically, if you plan on staying in your home for five or fewer years, then the renovation should be considered improvements on investment. If you will be there longer, your renovation should focus on what will best serve you and your family. If you’re trending towards improvements on investment, your renovation might focus on facelifting aspects of the kitchen like installing new countertops or repainting, but may be more extensive. Does your kitchen desperately need a renovation to be attractive to potential buyers? You may still find yourself undertaking a major renovation, but the choices you make and the budget you set will reflect the goal of maximizing the bang for your buck and spending less on the little touches that you personally might prefer. If you will be staying in your home, your budget is less a matter of investing in real estate and more investing in your enjoyment of the home. That doesn’t mean, however, that you should run wild with the checkbook. You can give your family an amazing, personalized kitchen while staying on track with spending. Regardless of when you will be moving, it makes sense to be familiar with similar renovation projects in your neighborhood. How did kitchen remodels affect the value of neighboring houses? Is your neighborhood expensive or more modest? Would a large renovation project be well-matched to the value of the homes in your neighborhood or do you run the risk of over-improving your property?
Where to put the money?
A kitchen renovation brings along many places to spend your budget. It’s smart to spend some time thinking about what items matter the most to you and which areas may be suited for cost savings. Do you need the highest-end lighting or would a lower-cost look alike work just as well at a quarter of the price? Should you focus on adding gadgets or on key elements that are hard to replace down the line? Put an emphasis on the things you don’t want to replace again. Quality cabinetry, good flooring, and professional tile work are three places that will impact the value and enjoyment of your kitchen and can be really frustrating and expensive to replace down the line. In contrast, cabinet hardware, appliances, and lighting are far easier to upgrade at a later date. If you’re tight on cash, focus on essentials and consider upgrading the easy-to-change items when your kitchen just needs a refresher.
Plan for the unexpected
Don’t rush to spend every dollar in your preliminary budget. You will undoubtedly encounter a surprise or two once walls and floors are opened up. While these unexpected costs can be frustrating, it usually means addressing and solving a problem before it becomes a disaster or risk for your family, so it’s money well spent even if it isn’t a lot of fun. Beware of budget creep, where the list of items getting replaced or repaired slowly gets longer as you encounter more little projects. These add-ons can seem minimal at the time, but they add up quickly. Establishing a budget isn’t easy, and probably isn’t the most exciting part of the remodel process. But having a plan will give you helpful guidelines for making smart decisions, and will ultimately help you get the kitchen that makes the most sense for your home and your family.
Step six of the design process addresses some of the challenges you may face during your renovation. While most problems can be avoided through careful planning, all kitchen renovations are bound to experience a surprise or two. Here are a few of the most common challenges faced in kitchen renovations, and some suggestions on how to minimize them through careful planning and fact-finding.
Design failures
Everyone has stepped into a bad kitchen and thought, “Who designed this?” Some common mistakes made during the kitchen design process include:
- Poor workflow. Kitchens are task-focused rooms, so designing for daily activities is essential. But even if the key access areas – sink, cook top, refrigerator – are properly placed, workflow can be hampered by poor positioning and scaling of other elements in the room. Sometimes the desire for one feature can impair usability of the kitchen. A center island is a popular way to increase work space, but making an island too big can reduce its usefulness. The work surface can become too large to use effectively, and the island itself will become a cumbersome barrier to walk around. Overemphasizing the desire for “more work space” results in a crowded kitchen with impaired workflow.
- The wrong type of storage. Many kitchens don’t need more storage; they need better storage. Without discussing your family’s unique storage needs with your kitchen designer, you may end up with the wrong shelving and drawer configurations, or inefficient placement of essential cabinetry.
- Cramped walkways. Putting too much or the wrong scale of cabinetry into a room can result in narrow work aisles. While your local building codes may allow for a narrow space between the range and other objects, remember that minimums are just that – the absolute minimum you should consider for your kitchen. Narrow aisles will cause traffic jams when more than one person in your family attempts to use the kitchen simultaneously.
- Awkward or limited outlets and switches. Power outlets always seem to be at a premium in kitchens. Not only are we using them to power our coffee makers and mixers; we plug in our phones, laptops, radios, and dozens of other gadgets. Adding outlets is inexpensive, particularly while other electrical work is being performed, so make sure you have access to power everywhere you will want it. Frequently, kitchen renovation plans don’t address how the flow of the space will change if cabinetry is being reconfigured. Remember that light switches may need to be moved for convenient access.
If you’re working with a professional kitchen designer, you can be confident that he or she will protect you from these textbook design failures. Still, entering into the process with an understanding of these potential pitfalls will help you ask the right questions when putting together your custom design.
Changing plans
The old saying, “Hindsight is 20/20” applies to kitchen renovations as well. Many homeowners who didn’t devote ample time to thinking through their requirements discover that they overlooked essential features during the planning phase. While some changes are easily and inexpensively incorporated into the plan, other alterations can be budget busters and add substantial time onto the project’s duration.
The best way to minimize plan changes and “job creep”—where the scale of the project slowly grows to encompass more of your home—is to plan well in advance and plan thoroughly. Allow yourself time to make changes during the brainstorming phase. Remember that after you start doing serious research on what you need and want for your kitchen you are likely to find a multitude of sources for inspiration. That’s great, but it does mean that what you thought you wanted when you started the planning process will not be exactly what you want by the time your contractor pulls into your driveway to start work. Don’t rush yourself, talk through the project with your designer and contractor and be explicit with the details of your plan.
Unanticipated complications
Your contractor thinks he or she knows your house, but there is always the possibility of a surprise or two lurking inside the walls. Depending on the age of your home, there’s a chance it includes outdated electrical wiring, decaying plumbing, or other hidden hazards. In some situations, licensed electricians and plumbers will demand that the problems be rectified to bring the room up to code. It’s ultimately important for the safety of your family and reliability of your home, but this can bring added expenses and delays. Ideally, your contractor or the electrical and plumbing subcontractors he or she hires will have worked on other homes in your neighborhood and will know what to expect once they start pulling off the drywall.
Inaccurate bids
While contractors strive to bring their projects to a close without going over budget, it does happen. Inaccurate bids are a frequent source of budgeting failures. Your contractor could potentially underestimate the number of hours required to complete a task, omit essential expenses, or build the numbers around less expensive parts than you had intended to use. While it can be difficult to spot these inaccuracies without firsthand experience on a renovation project, here are a few suggestions on how to double check when reviewing your contractor’s proposed contract.
- Underestimating hours. Labor costs comprise a substantial portion of any renovation project’s budget. Talk to your contractor to get a handle on exactly who will be working on every phase of the project and how much time will be allotted. Ask if the bid is fixed. Should additional time be required to complete the project, find out how that would be billed and what allowances would be made for small overages. Ask your contractor to explain how you will differentiate between added hours of work due to changes you request and added hours due to workers simply exceeding the contract’s estimates.
- Omissions. Did your contractor neglect to include a few essential SharkBite valves for your sink’s plumbing? While buying a $20 part here and there doesn’t seem like much, the cost of these little omissions can add up. Ask your contractor if he or she has allocated some portion of the budget for oversights like this, as well as parts that may break during the renovation process. Hard costs are what they are, but you will be happier if you establish an allowance for some of these small expenses than run over budget.
- Price discrepancies. Your contractor budgeted for a $200 faucet, but the one you want is closer to $500. Step through these line items together before finalizing your contract to ensure that you are setting realistic estimates for the cost of parts.
Quality Issues
Not every paint job is perfect. Newly installed plumbing can leak. Outlets can intermittently fail to function. Tile can be misaligned. While your general contractor likely came highly recommended, lapses in quality can happen. While problems like these can be upsetting, do your best to stay calm while addressing them. Remember that it’s in your contractor’s best interests to fix any problems promptly and ensure that you are completely satisfied. Review progress on a daily basis and take note of anything that seems wrong. Review any quality issues with your contractor or job site supervisor on at least a weekly basis so that they can be resolved while the appropriate crews are still on-site.
After the project is complete, go over the kitchen with the proverbial fine-toothed comb. Review any remaining issues with your contractor to create a written “punch list.” Coordinate a completion date for the resolution of any outstanding problems; your contractor will be eager to move on to his or her next job, and you’ll be more than ready to start enjoying your beautiful new kitchen.
Not every kitchen renovation runs without snags, but keeping the above problems in mind will help you to establish a better plan, ensure you and your contractor are in total agreement, and make it easier to work through challenges without frustration should they occur.